A common procedure in managing a WordPress site is having to update your theme and plugins. If you are using a theme installed via WordPress.org’s collection of free themes, WordPress can automatically alert you to an available update for your theme and easily update it for you with the click of a button. In the case of certain premium themes or custom themes that are not sourced via WordPress.org, you may need to manually update your theme as new updates become available.
As of WordPress version 5.5, you can easily update your theme in your website’s backend by uploading a zip file of the new version. Follow the steps below to manually update your theme.
Note: It is highly recommended to always backup your site before updating any theme. If you have a staging environment, it is recommended to test there first before making any changes to your live website.
- Backup your website.
- Download the zip file of the new version of your theme from the source. For premium themes, that should be from the website you purchased the theme at originally.
- Login to the backend of your WordPress website.
- Navigate to Appearance > Themes.
- Click the “Add New” button at the top of the page.
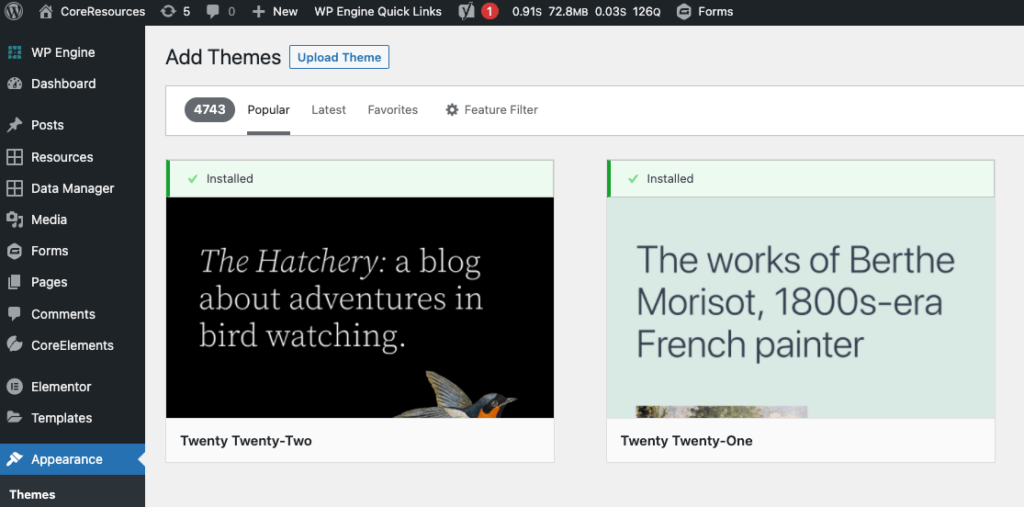
- You will be prompted to select the zip file from your computer. Select the file from your computer and then click “Install Now”.
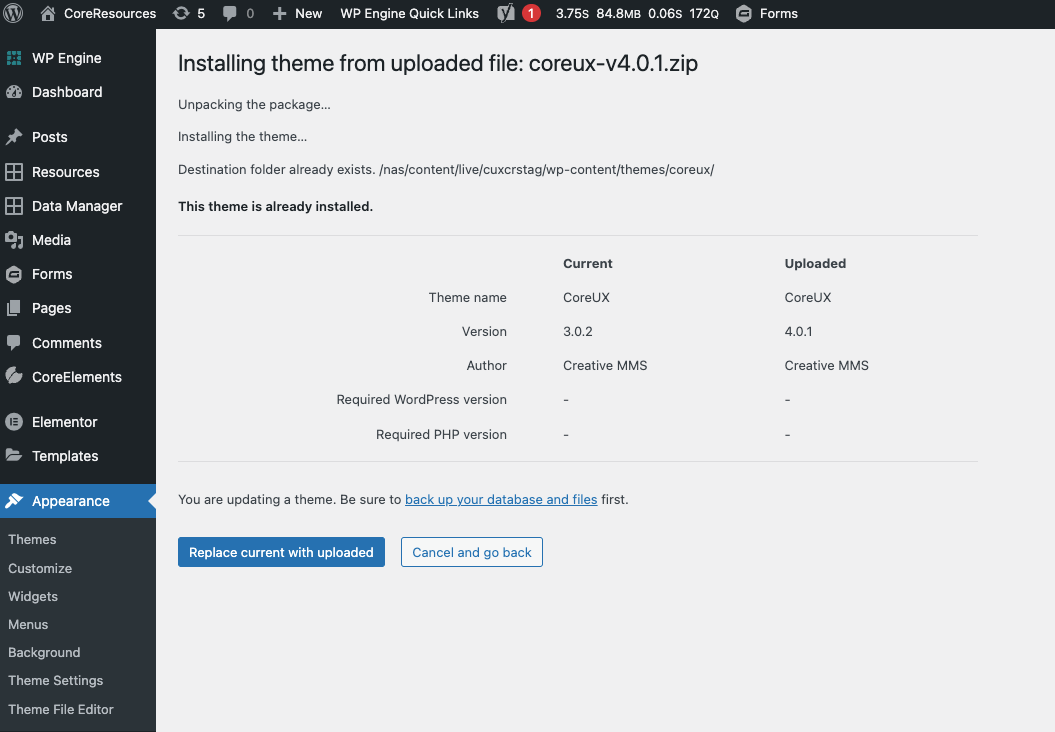
- Before installing the update, WordPress will show you a comparison of the theme you are updating. You can check the currently installed version against the new version and double-check you want to confirm going through with the update. If everything looks good, press the “Replace current with uploaded” button to continue with the update.

- Once the update is complete, WordPress will confirm the theme has been updated successfully. If you have any type of server cache or plugin caching on your website, it is a good practice to clear those caches once the update is completed to help ensure your users are seeing the latest updates when visiting the website.
- After updating the theme and clearing caches if any, test the backend and frontend of your site. When testing the frontend, use a browser/window where you are not logged in to see the site the same as your users.
- If everything is looking right and behaving normally, your theme update was successful and you are finished.
- If something does not look or behave right after the update, first try testing your website again in a different browser or a private/incognito window to ensure it is not a local caching issue from your browser. If a different browser or private window looks right, the update was successful.
- If you are still having issues after testing without local browser cache, it may be a problem from the theme update. You can try reverting to the backup you made before the update and work with your IT team to help resolve the issue.