Overview
The Field Builder allows the creation of custom fields for Resources. You can create custom field groups for your custom resource types as well as for the default resource types.
List View
To see all of your current Field Groups, go into the backend of your site and click the Data Manager link in the left admin menu, then click into the Field Builder tab. On a fresh install, you will see the message “No Field Groups exist, to get started click ‘Add New ‘above”.
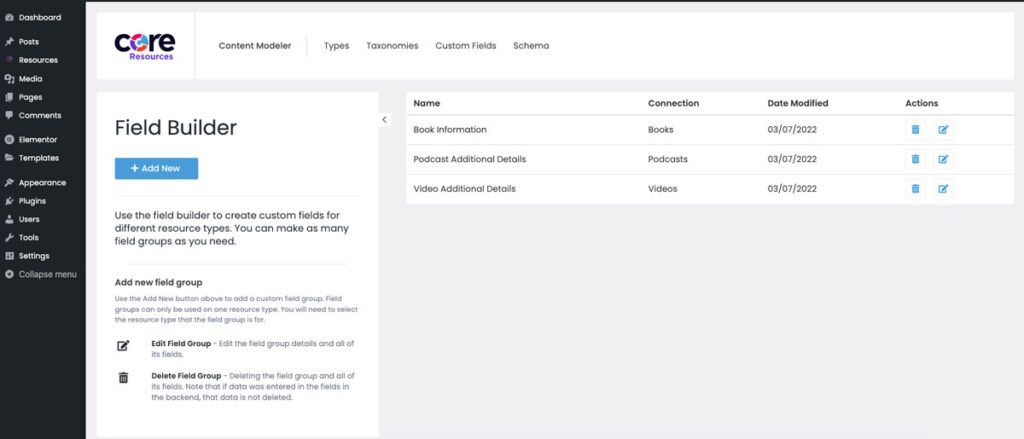
Once you start adding Field Groups, you will see a list of all of them with the following information:
- Name – the name you have given to the field group
- Connection – the Resource Type that the field group is connected to
- Date Modified – the last date the field group was changed
- Actions – here you can Edit Field Groups and Delete Field Groups.
Add New Field Group
On the list view of the Field Builder, click the “Add New” button at the top to be given a screen with the following fields to fill out:
- ID – this will auto-populate based on what you type in the Group Name below
- Group Name – the unique name for your group of fields
- Connection – the Resource Type that the field group will be associated with
Once you properly fill out the fields, press “Create” at the bottom. As long as there were no issues with your chosen names, you will receive a success message and you will be directed to a new screen where you can start adding fields.
Adding Fields
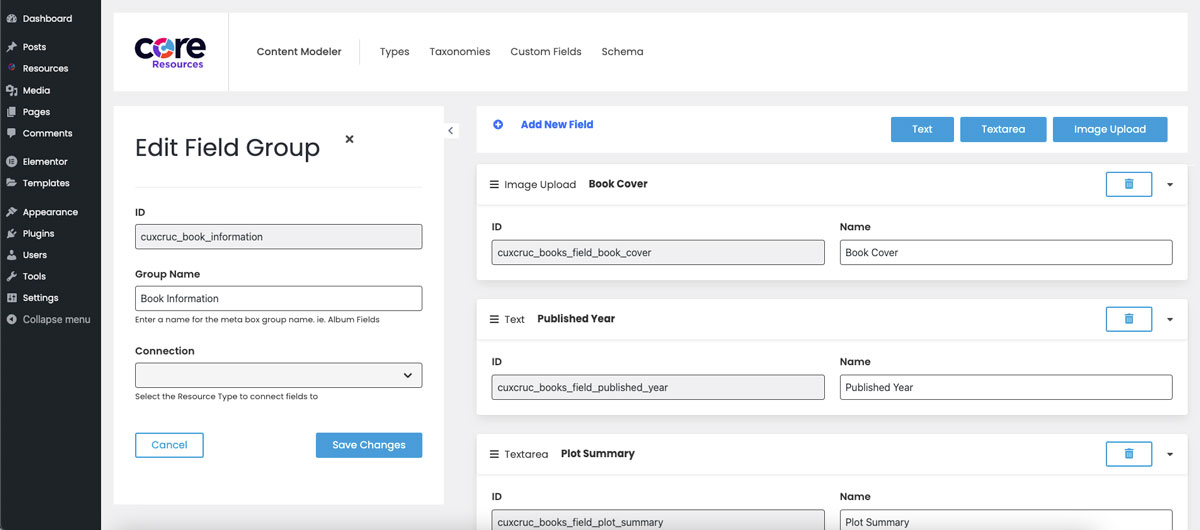
Once you’ve created the field group, you’ll see a screen with your field group information on the left and an area on the right to add the fields. On the top are the list of field types:
- Text – a plain text field
- Textarea – a bigger plain text field that accepts line breaks
- Image Upload – a single image to select via the media library or upload new.
Click on a field type and it will drop the field down below.
For each field, you need to enter a field name. This label will appear on a corresponding field in backend of a Resource where you will enter that resource’s individual data. As you type in a field name, it will auto-populate the field ID. Each field needs to have a unique ID.
Once fields are added, you can also click & drag them to change the order of the fields. This will change the order of the fields as displayed in the backend of a Resource.
After all your fields are added and in the order you want, click “Save Changes” on the bottom left.
Using New Fields with Resources
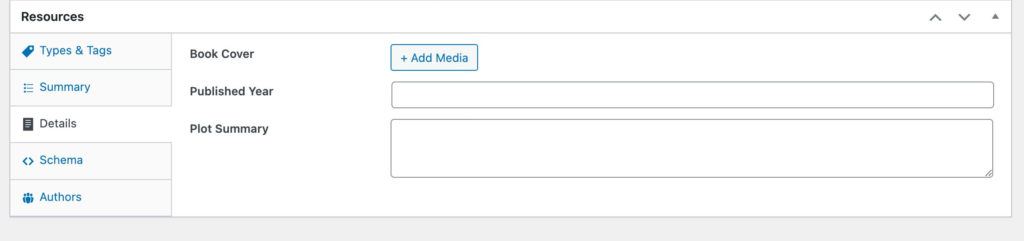
To see your new fields in the backend of a Resource, navigate to Resources and Add New or edit a current Resource. Change the Resource Type to whichever type you connected your new field group to. Then click into the Details tab and you will see your new fields.
Editing a Field Group & Fields
When viewing the list of field groups, the Actions column contains an Edit icon – it is the 2nd icon in the list. Click the icon for the Field Group you would like to edit.
Once you are taken to the edit screen, you will see it is very similar to the Add New screen except it will be pre-populated with the current field group’s information. You can edit these fields as desired except for a few rules:
- You cannot change the field group ID once it is created.
- You cannot change the Connection of a field group once it is created.
- No field IDs can be changed after they were first saved – only their name can be changed.
Once you have made your changes, click the “Save Changes” button on the bottom. Your changes will now be reflected in the backend.
Removing Fields
When you are inside the edit screen of a field group, each individual field has a Delete icon.

Before deleting one, understand how deletion works:
- Fields cannot be auto-restored after deletion. You can recreate a field with the same ID at another time if you need to.
- Any Resources that were using this field will not be deleted. The data that was in the fields will still technically exist in the database – so if you were to manually recreate the field with the same ID some time after you deleted it, you can potentially recover that data.
Make sure you know what you are doing before deleting something. It is always a good idea to backup your website before deleting something in case it creates issues.
Elementor: New Fields in Dynamic Tags
If your website is using Elementor and you are utilizing Elementor templates for your Resources, you can easily add your new field data to the templates. All new fields get automatically added to 2 dynamic tags: Resource Details and Meta Box Fields.
To utilize the dynamic tags, follow these steps:
- Open up the Elementor editor for your page or template.
- Drop a widget that accepts dynamic content, such as the Headline or Text Editor widgets. Open up the dynamic tag menu and choose Core Resources Custom Content > Resources Details from the list (it may be towards the bottom)
- Once that is selected, open the Resource Details dropdown to see an organized list splitting up fields by Resource Type. Scroll through the list to find your field and click on it.
- If you are selecting a textarea field, you may also want to toggle on the Auto-format breaks option to retain any line breaks that were entered into the textarea field in the backend.

If you are not seeing the fields you expect in the list, here are a few things to try:
- Make sure you have content entered in the backend of those fields before trying to pull them in.
- If you are using an Elementor template rather than editing a singular resource in Elementor, click the Settings icon at the very bottom left on the Elementor editor sidebar. Open up the Preview Settings section that appears in the Single Post Settings.
- Make sure Preview Dynamic Content is set as Resource.
- Then in the field below, search for one of your Resources that is utilizing the field(s) you are trying to pull in and select it.
- Hit the “Apply & Preview” button, this will reload the Elementor editor view. Then check the list again.
- Still not seeing them? Click “Update” to save the Elementor template changes. Then manually refresh the page and check again.
- Is your site utilizing any type of caching in the backend? Try clearing your site caches.
- In addition to the Resource Details dynamic tag, you can also try the Meta Box Field dynamic tag.
- Once you open a dynamic tag menu, click the Post > Meta Box Field dynamic tag. This will have a select dropdown with all the custom fields, organized by content type rather than by Resource Type.
Deleting a Field Group
Just like with editing a field group, check the Actions columns of the list view – the 1st icon is the Delete icon.
When clicking to delete a field group, you will be asked to confirm that you want to delete it. Before deleting one, understand how deletion works:
- You cannot restore a field group after you delete it via the Content Modeler. You would have to manually recreate it or restore a full website backup.
- If any Resources had data in the fields from the deleted field group, that data will still exist in the database. Because of this if you were to manually re-add the field group using the same field names as before, the data would be accessible again.
- If you’re using Elementor and have pulled the custom fields via dynamic tags, those widgets pulling the dynamic tags will still exist on the page but they will reset once you open the page/template inside the Elementor editor view.
Make sure you know what you are doing before deleting something. It is always a good idea to backup your website before deleting something in case it creates issues.