Overview
Managing taxonomy terms can differ depending on the taxonomy in question. Resource Types and Webinar Status have their own set of rules, while Resource Tags and any custom taxonomies may not work the same way. Read on below for more details into each type.
Resource Types
To manage your Resource Types, see the Content Modeler Resource Types section for full details on how to add, edit, and delete terms for the Resource Types taxonomy.
Webinar Status
The default taxonomy of Webinar Status cannot have new terms created. It has 2 default terms of “Past” and “Upcoming” and only their labels can be changed, by navigating in the backend to Resources > Dashboard > Resource Types Settings and clicking into the Webinars tab. See the Standard Taxonomies page for further details on the Webinar Status Taxonomy.
Resource Tags & Custom Taxonomies
The default Resource Tags taxonomies and any custom taxonomies that are added can be managed in the standard WordPress manner. Continue reading for details on how to add, edit, and delete terms for these taxonomies.
For demonstration purposes, we will reference the Resource Tags taxonomy in the instructions below, but these instructions will also work for your custom taxonomies.
Add New Terms
In the backend of your website, hover over the Resources menu on the left admin menu bar. Look through the listing of sub links – you will see “Resource Tags” (as well as any custom taxonomies) – this will take you to the backend area for managing these terms.
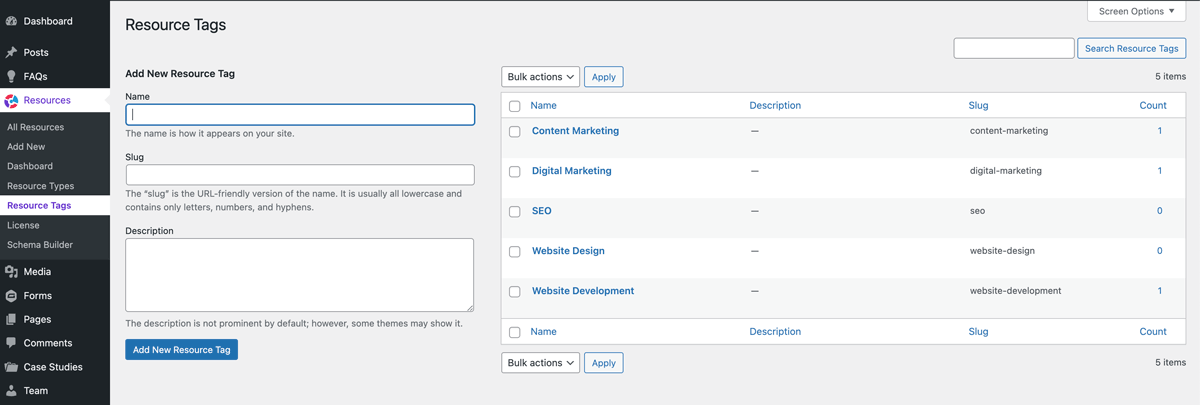
On the left there are 3 fields you can fill out to create your term.
- Name – the label of your term as displayed in the backend & anywhere used on the frontend
- Slug – this is for the URL of the term if it is a public facing taxonomy. If left blank, it will auto-generate based on the name
- Description – An optional field to describe what the term is for. By default this is not shown on the frontend but it is possible to display it there.
Fill these fields out and click “Add New Resource Tag”. Once that finishes saving, you will now see your new term on the right side that displays the list of terms.
Edit Terms
While on the taxonomy term backend page, you can see all terms on the right side of the page. Hovering over the name of a term will display a menu to Edit, Quick Edit, or Delete. You can also click directly on the name to go to the Edit page.
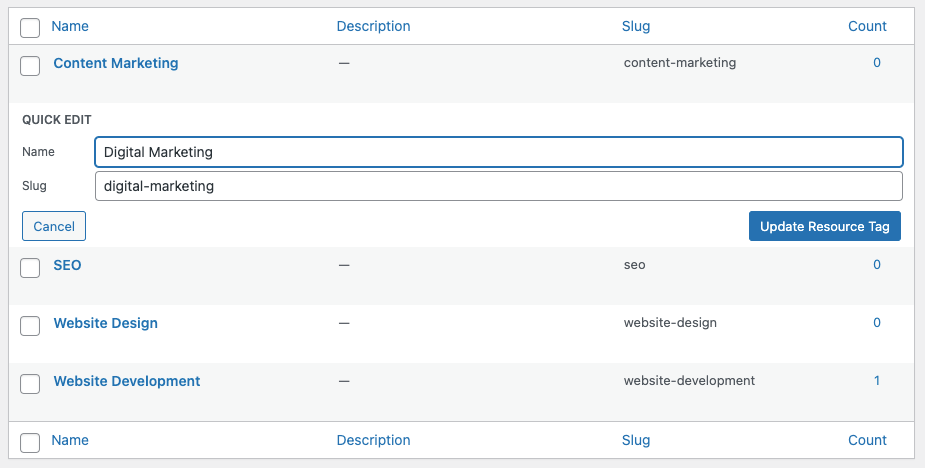
Edit vs Quick Edit
Edit will take you to a new page where you can change the Name, Slug, and Description just like when you added a new term. Quick edit will open a panel on the current page where you can edit the name and slug. You cannot edit the description via the quick edit screen.
Note: If this is a public facing taxonomy and you are using an SEO plugin, such as Yoast SEO, you will need to use the Edit view instead of the Quick Edit view to be able to manage the SEO meta data for that term.
Delete Terms
Hovering over a term on the backend page will display a link to Delete a term. When you click it, you will be asked to confirm that you really want to delete the term.
Note: deleting a term does NOT delete any Resources associated with this term. Instead that term will be automatically removed from the Resource since it will no longer exist.